 Tweet
Tweet
Hello, how are you?.
Recently I finished an old project, two arcade cabs I have in my home.
I want to share the progress I made:
The beginning:


Since one of the screens was broken, I decided to replace both of them:


I designed some art from the marquees and panels:


The controls:
I hacked some gamepads to map the controls:
This is the second panel I made:

In a recent trip to the USA I bought LED buttons for the cabs:


Those little switches at both sides are in reality interruptors for the turbo function.
Since I had lots of problems because of the ID linux assigns to the gamepads (ocasionally the controllers switched places after boot), and I couldn't fix it by system rules, I decided to solve the issue by hardware.
http://home.cogeco.ca/~rpaisley4/LM555.html#29
I build the above NE555 timer power on delay circuit, the PNP transistored version. I used a 22K and 6,8K resistors and a 1000uF capacitor to get the correct timing.
I use the circuit to delay the detection of the Player 2 controller. This way I allways get the controllers in the correct order.
Here's the circuit in a case:

I had to power the above circuit directly from the PSU since the amps from the USB port were insufficient.
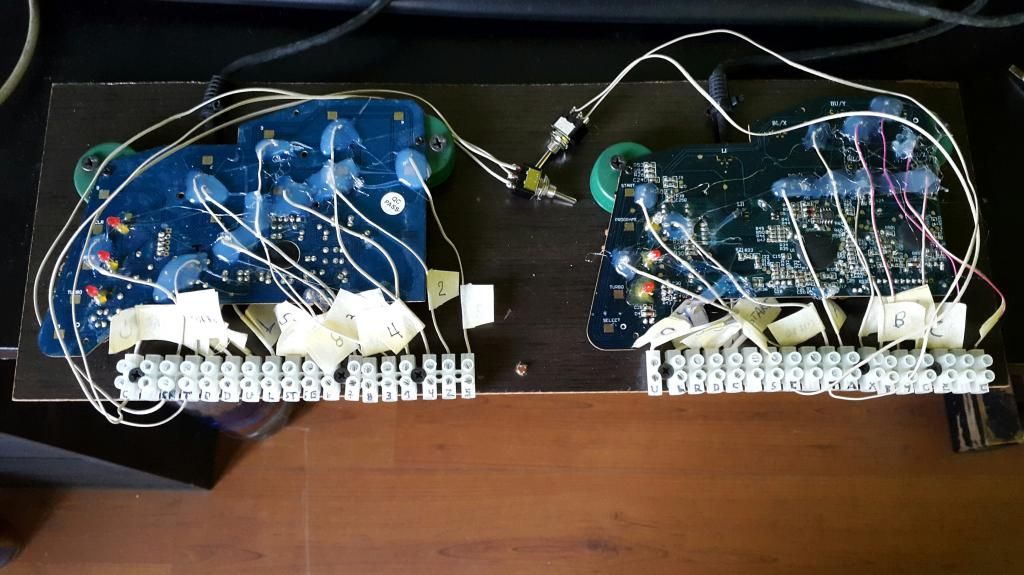
Here is all the wiring of the control panels


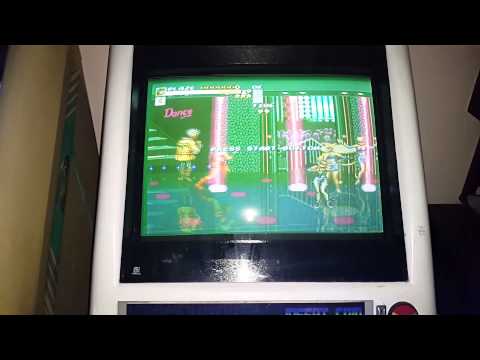
The video:
I found a board very similar to the J-PAC at a local store:

Since I use only video, I cut out all the unnecessary cables from the JAMMA connector.

Power:
I recicled an old CD writer case to build this little panel, to be able to switch on the machines from the front:

I put a button in the coin door to switch on the computers:

Marquees:
I did a new paint job in the speakers grills, and replaced the light tube with a led band:

The computers:
I decided to place the cases with the back side upside. That way the height is lower and I can introduce the cases easily in the cabs:


I used the holes from the base for the POWER and HDD leds and to hold my DIY rack solution for the hard disks. I recicled some spare wood from a crate and two old CD writer cases:


The computers inside the cabs:


SPECS:
Left Cab:
CPU AM3 Amd Athlon 270 X2.
4GB RAM.
Video Radeon HD 5450.
250GB HD.
Right Cab:
CPU AM2 Athlon X2 4200+.
4GB RAM.
Video Radeon HD 4350.
160GB HD.
I extended two USB ports for the wireless keyboard and USB drives:

The Sound:
I just hacked two PC speakers and fit the board inside a case, and soldered some RCA connectors for the output.


The stools:
This was a family project ^_^.

Ready for action!:


And at last, a little video of both cabs:
I began this project in January 2014. I did lots of mods to both cabs, and I learned a lot in the process.
In the end, March 2015 I can say I'm happy with them.
These cabs are the perfect excuse to hack retro games just to play in them. I have to format all the codes I created with these cabs in purpouse...but didn't have enough time .
.
I hope you like them .
.
Whipon.
Recently I finished an old project, two arcade cabs I have in my home.
I want to share the progress I made:
The beginning:


Since one of the screens was broken, I decided to replace both of them:


I designed some art from the marquees and panels:


The controls:
I hacked some gamepads to map the controls:

This is the second panel I made:

In a recent trip to the USA I bought LED buttons for the cabs:


Those little switches at both sides are in reality interruptors for the turbo function.
Since I had lots of problems because of the ID linux assigns to the gamepads (ocasionally the controllers switched places after boot), and I couldn't fix it by system rules, I decided to solve the issue by hardware.
http://home.cogeco.ca/~rpaisley4/LM555.html#29
I build the above NE555 timer power on delay circuit, the PNP transistored version. I used a 22K and 6,8K resistors and a 1000uF capacitor to get the correct timing.
I use the circuit to delay the detection of the Player 2 controller. This way I allways get the controllers in the correct order.
Here's the circuit in a case:

I had to power the above circuit directly from the PSU since the amps from the USB port were insufficient.
Here is all the wiring of the control panels


The video:
I found a board very similar to the J-PAC at a local store:

Since I use only video, I cut out all the unnecessary cables from the JAMMA connector.

Power:
I recicled an old CD writer case to build this little panel, to be able to switch on the machines from the front:

I put a button in the coin door to switch on the computers:

Marquees:
I did a new paint job in the speakers grills, and replaced the light tube with a led band:

The computers:
I decided to place the cases with the back side upside. That way the height is lower and I can introduce the cases easily in the cabs:


I used the holes from the base for the POWER and HDD leds and to hold my DIY rack solution for the hard disks. I recicled some spare wood from a crate and two old CD writer cases:


The computers inside the cabs:


SPECS:
Left Cab:
CPU AM3 Amd Athlon 270 X2.
4GB RAM.
Video Radeon HD 5450.
250GB HD.
Right Cab:
CPU AM2 Athlon X2 4200+.
4GB RAM.
Video Radeon HD 4350.
160GB HD.
I extended two USB ports for the wireless keyboard and USB drives:

The Sound:
I just hacked two PC speakers and fit the board inside a case, and soldered some RCA connectors for the output.


The stools:
This was a family project ^_^.

Ready for action!:


And at last, a little video of both cabs:
I began this project in January 2014. I did lots of mods to both cabs, and I learned a lot in the process.
In the end, March 2015 I can say I'm happy with them.
These cabs are the perfect excuse to hack retro games just to play in them. I have to format all the codes I created with these cabs in purpouse...but didn't have enough time
.I hope you like them
.Whipon.

Comment